March 28, 2013

New Home Needed for Possibly Antique Crazy Quilt

old crazy quilt
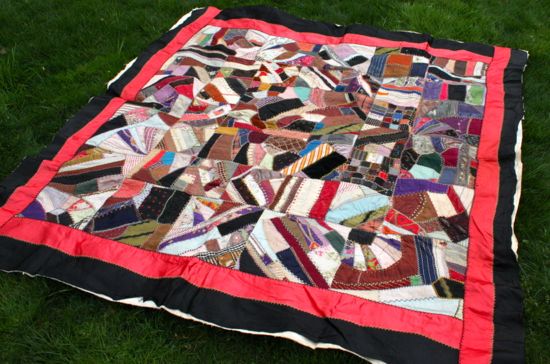
Back in the early-mid 1990s, my grandmother gave me a quilt top, since I was into quilting. I think she may have picked it up at a garage or estate sale, but I don't know for sure.
old crazy quilt
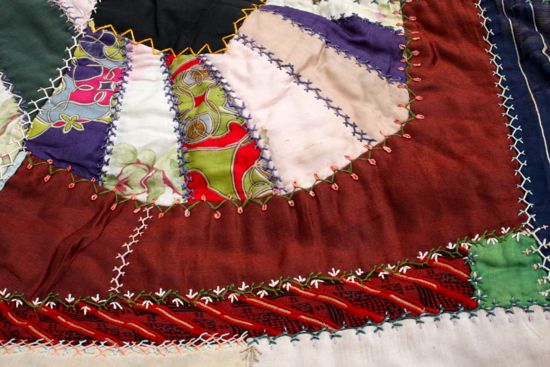
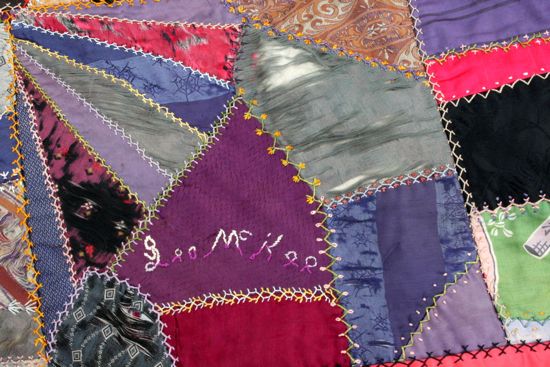
It's a traditional crazy quilt, with hand-embroidery around the edges of every single piece of fabric. The time and love that went into making this is a bit mind-blowing.

The fabrics are all over the map, but they tend toward the satin, silk and velvet. Some of them look like they started life as ribbons.
old crazy quilt
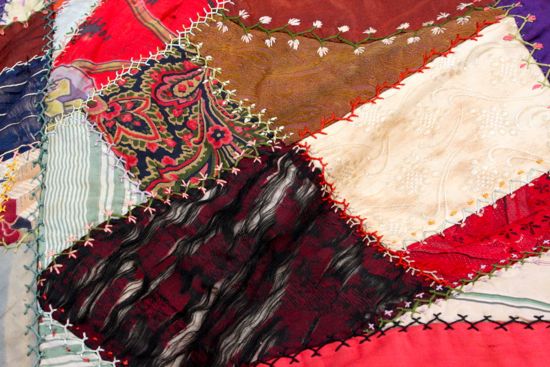
Not all of them have held up so well.

And unfortunately, I'm not enough of fabric historian to have any real clue as to the age of this quilt top. Some of the prints make me think of the 1960s, but I could be way off.

The crazy blocks were assembled onto backings of less delicate material, most of it tea-colored, with a layer of batting between. It feels like cotton to my fingers but I suppose it might be wool. The blocks are hand stitched together, with the seamline covered in embroidery.
old crazy quilt
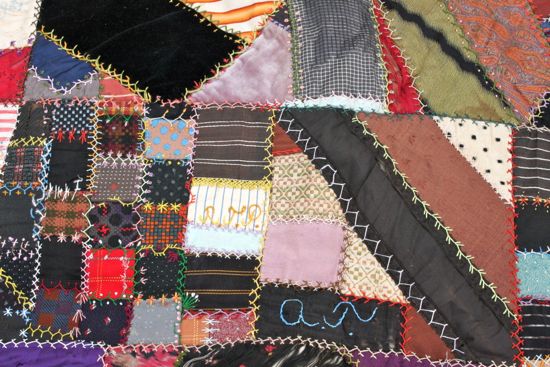
The amount of embroidery in this is staggering - have I said that already? The block on the left here looks a little postage-stamp-y.

A number of the blocks are signed, again with embroidery. Maybe this one is "Lee McKee"?
old crazy quilt

Other names:

L.M. Mc.
A.T.
R.T.P.
R. T. Pettenger
I.F.P.
E. M. Pettenger
Wesley Pettenger
W.J.P.
L.D.P.
old crazy quilt
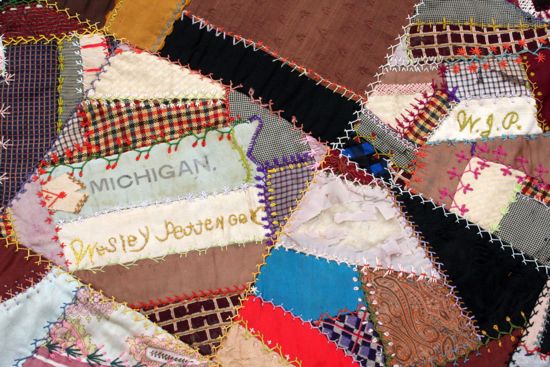
I can't begin to guess if this Michigan ribbon is a reference to a school or to the state. Maybe a fair? Was this quilt made in Michigan? By people from Michigan who had left and were homesick? What was the occasion for the quilt? What stories are in these fabric choices?
old crazy quilt
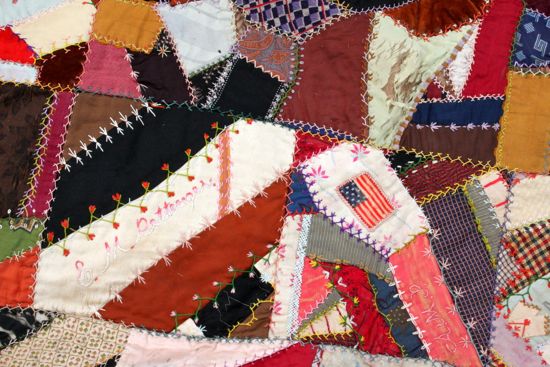
Or in the inclusion of this small American flag?

This quilt is unfinished and a bit care-worn. But despite my grandmother's gifting intentions, it's not really my style and I'm unlikely to mend this one or give it any love. I'm admitting this after carting it around for 16 years and doing nothing but keep it safe and dry.

Could the blogging-quilting community help out here? Anyone know any Pettengers who might be related to this quilt? I know lots of us are more "modern" quilters, but does anyone know anyone who has the skills and inclination to mend/restore/finish this quilt? Barring that, does anyone have any recommendations for an appropriate donation destination, a historical society or quilt museum?

March 27, 2013

Bloggers' BOM Quilt Almost Done!

I've got my first completed quilt top of 2013!

Really, it's amazing what one can do with several hours of quilty time each week. I've recently started working on Fridays at Stash Quilt Shop, and when I'm not cutting fabric for folks, I've got access to a sewing machine. There are several BOMs from last year that never got finished, so I'm using my Stash-time to finish them up. First up, since it was the farthest along: the Bloggers' BOM from Jackie at Canton Village Quiltworks.

The blocks are on point, with shashing and stepping stones. I think the border is called "piano keys" when it's made up of narrow strips like this. (Note to self: this style stays straight much easier if you can piece long strips, then cut several strip sets at the desired width.)
Bloggers' BOM top completed!
I'm pretty pleased with how the angled corners came out in the border. I suppose it would have been easier to add triangles before the border, so that the border corners were at right angles. And I don't have any great guidelines for doing those wider angle easily or neatly. I left the last half-inch or so unsewn on the long edges, added 3.5in squares to the ends of the shorter border sets, attached the border, then did some folding, fudging and finagling, with a lot of help from the iron, to overlap the borders at the corner. Pin, sew, press, sew again if pressing revealed that the seam was in the wrong place. It's an inelegant system, but most of the corners came out well. There are a few tiny puckers in some of them, but you'd have to be really looking for them to see them.
Bloggers' BOM top completed!
Once the first border was nearly done, I decided to go around one more time with the white and square it up with corner triangles. I liked the idea of the inner border looking like it was floating around the center blocks. Now, to decide what to bind it with... Should I pick out one of the colors or look for a fabric that could bring out several of them? I currently thinking the backing will be black and white. Maybe a gray binding?

And should I name this one something more interesting than "Bloggers' BOM"? I was thinking Jewelbox, but I'm not sure it'll stick. Thoughts?


March 25, 2013

Claiming my Blog

Follow my blog with Bloglovin

(I'm hoping to make a real post later today or tomorrow... This is just so that BlogLovin' knows that I'm here.)

March 22, 2013

My New Tiramisu

We finally had a day where all the variables lined up: decent light, not too cold to be outside in short sleeves, Ian available to take the photos. Here's my very own Cake Patterns' Tiramisu, the first completed real installment in my personal Wardrobe Improvement Project!
My Tiramisu
I started this dress during StephC's Tiramisu Sewalong, but didn't manage to finish with everyone else. The 30 minutes a day format of the sewalong didn't quite work for me (although it's possible I could have adjusted things to make it work) and I spent so much time trying to get the fit just right. I think it's close, but I'm not sure it couldn't be better. Sometimes, though, it's just time to move on.
My Tiramisu
I did appreciate saving the side seams til the end; I think that part helped a lot with getting the waist fitting right.

(Yes, I am really that pale. It's spring in Seattle; we haven't seen the sun in months, and I'm not exactly a winter sport enthusiast making sure I acquire what little Vitamin D is available during the dark months.)

I used my new serger so hopefully all my seams are durable yet have some stretch to them. I'm a little worried about the midriff band, since I feel I need to be careful with those horizontal seams when taking the dress on and off. I'm not technically an hourglass, but my shoulders are wider than my waist.

Since wearing the dress, I've sewed the pockets closed and may get around to cutting off the pocket bags entirely. Maybe they would have worked out better if I'd stuck with the knit for the pockets instead of using some cotton. I was trying to avoid extra bulk at the hip line, but the change of fabric didn't really solve that. As an unwelcome bonus, the stiffer cotton made the pockets gape open in a rather unflattering fashion. Maybe a different knit would have made for less obvious pockets? This one is a touch on the cling-y side, so I'm pretty sure anything I put in the pockets would be visible and bulky-making.

I'm looking forward to warmer weather so I can wear my Tiramisu regular-like. I don't know yet if this is a special occasion dress or an everyday dress. Can it go to the Farmers' Market in the summer? If I wear it as a regular thing, does it change what I do? I wear jeans a lot now because they are warm and comfortable and versatile. I like the idea of skirts and dresses as a more regular part of getting dressed, but does that work for anything other than a long full skirt? What about full but less long? Less long and more a-line?

March 20, 2013

Things I Haven't Photographed Lately

  • The 60 tiny onion plants I put in the p-patch over the weekend and the countless buckets of winter weeds I removed.
  • The daffodils in the backyard. The lobelia around them is starting to bloom as well, so parts of the garden have the classic yellow/blue combination going on.
  • A box of 3/4 in washers, a result of yak-shaving.
  • A flower spike on our amarylis - with any luck, this time it won't commit suicide before it blooms!
  • The first of the star magnolia blooming by the house.
  • Absolutely everything piled up on tables in preparation for our first professional carpet cleaning. I honestly had no idea that this was a thing that you're supposed to do regularly!
  • Rhubarb!
  • Two pounds of seed potatoes prepped and sitting on the windowsill.
  • Three knits in the cranberry-magenta-pink family, purchased because I miscalculated several months ago.
  • A black and white version of this scarf - this one is for me.
  • Pea seedlings just emerging.
  • The pear tree rushing to be the first to bloom.

March 18, 2013

Snowshoeing

For the first winter in three years, it hasn't snowed in Seattle. Caitlyn takes this as a personal offense.

We've been meaning to try snowshoeing for years. Somehow planning the outing has never bubbled to the top of the list. So, thanks are in order to Eldan for providing a sufficient nudge and to Melinda for joining us! (Maybe next time, we'll get both of you!)

It was quite a bit easier than I thought it would be. Sure, we wore ourselves out, but no one got tangled up in her snowshoes unless she meant to.
Caitlyn snowshoeing
This being March in the Pacific Northwest, it was raining. Caitlyn ignored the weather completely and started scooping together snowballs as soon as she tumbled out of the car. She took every opportunity to fall down in the snow: sliding down little slopes on her bum and her belly, trying to run, attempting to walk backwards (since the REI rental guy told her she wouldn't be able to), falling down accidentally then re-enacting the event several times with deliberate falls.
Caitlyn snowshoeing
The rain became snow before we were done... Just magical.

It's possible we should go to the snow more often.
Caitlyn snowshoeing
Of course, next time, I need to remember that Caitlyn will need a complete change of clothes for when we get back to the car. She was soaked through (yes, through all the waterproof layers) and days later is still complaining about being cold!

March 13, 2013

Waiting for Sunshine

Ian's wardrobe has two modes. If it's gray and rainy outside (roughly October til late April), he wears long sleeves and all black. If it's warm and sunny, the sleeves get short and the colors get bright. I mean, really bright. He's got a shirt that's a bright orange with little black kokopellis on it.

About a year and a half ago, while we were in a fabric store for some other reason, Ian found a fabric he liked. Sure, I'll make a shirt. We have a go-to pattern for him (McCalls' 4079), I've already noted all the adjustment to make, and we found perfectly matching buttons.

I have no excuse for why this shirt was just fabric until last week.
blue shirt
But it's a shirt now!
blue shirt
This is maybe my fifth version of this shirt (there's a black one, a brown one, a plaid one, and, yes, the orange one, that I can think of just now). I think each one is a little better than the last. I'm taking more time with the details, making something sturdy and quality.
blue shirt
The side seams are flat-felled, I didn't skip the handstitching this time, and I used the serger for the arm seam. Maybe some day I'll be brave enough to try flat-felling the shoulder seam.

Now, all we need is a return of the sunshine so Ian's brighter wardrobe can come out and play.

March 12, 2013

Amuse your Child and Irritate your Cat in 4 Easy Steps

1. Bring your child and your cat together in the same location. This is easy to do if there's food available, or even just the vague promise that there might be food for at least one of them.

2. Let the child pick up a shiny object. Today, Caitlyn chose a can opener. Let the child do random things with said shiny object. For example, open and close the can opener in a sideways position. Experiment with putting can opener handles on either side of a can or jar.

3. Let the cat choose a position on the other side of the counter from the child. This is easy if you have a stool and the cat is accustomed to sitting on it when you cook, perhaps out of some delusion that some of that food might be destined for his dish. Wasabi begs indiscriminately.

4. As long as there is a light source above and behind the child with shiny object, a light spot will appear on the ceiling above and behind the cat. This will cause the cat to look frantically up at the ceiling, chattering at the flickering spot.

The cat's behavior will cause the child to realize she's created a light spot that interests the cat. The child will then adjust her random movements with the shiny object to more directly get a response from the cat.

This is a potentially infinite loop, at least in our house. I suppose at some point the cat might recognize the light spot on the ceiling as being unattainable or the child might get bored or realize her post-school cereal is getting soggy, but around here, this game only ends at the request of the present adult.

March 01, 2013

Tutorial: Square in Square Block

Welcome to March! For us northerly types, the days are visibly longer already, and the buds are swelling on the trees. One of these days, the sun will stop teasing us, and we'll all squint and complain about how bright it is.

March is my month to lead Sew.Quilt.Give. It's probably unnecessary for the bee participants, but I'm taking the opportunity to write a tutorial for my chosen block, the Square in Square block. It's a first for me (the tutorial writing, not the block), so if you have any constructive feedback, please share!
2 blocks
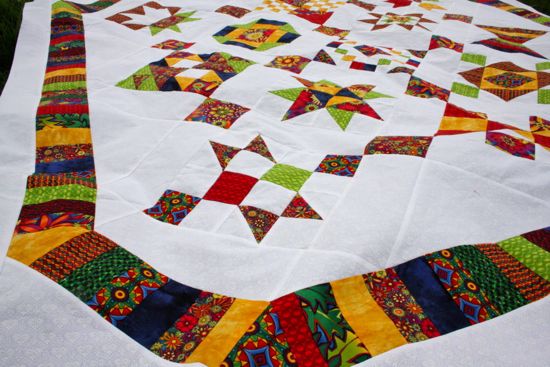
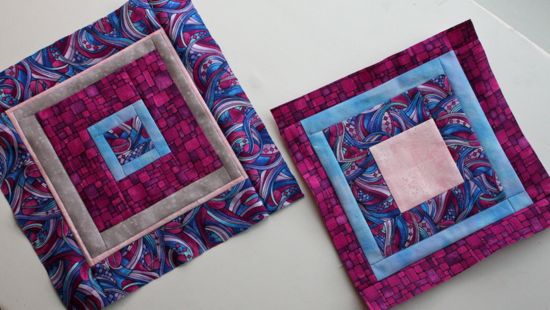
This block is a variation on the traditional Log Cabin block. Kinda a bummer that it has such a ho-hum name, I think; other log cabin variations include Courthouse Steps, Pineapple, Bricklayer, and Housetop. But "Square in Square" is an accurate, if not terribly poetic, description. It's a super simple block to make, with lots of room for customization.

fabric selections
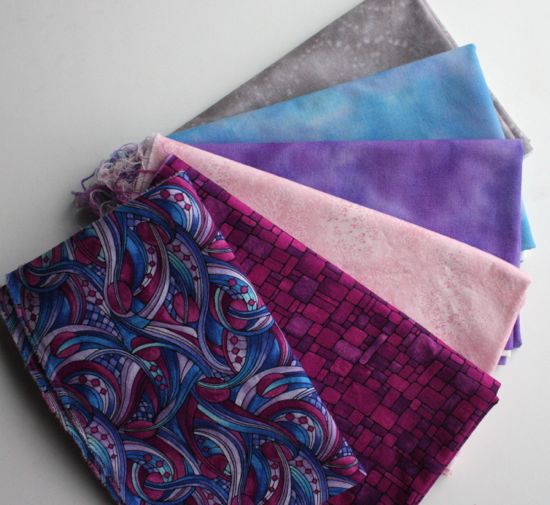
Here's the fabric I'm using. Starting from the gray and working up: Tokyo by Red Rooster Fabrics; Perfect Palette in blue and purple from Fabric Freedom of London; Fusions in pink from Robert Kaufman; and two designs from Light Fantastic from Fabric Freedom of London. I found all of these at Pacific Fabrics, one of my local quilt fabric stores. This is more fabric than you'll need, but I like to have options when I work.

start with a square
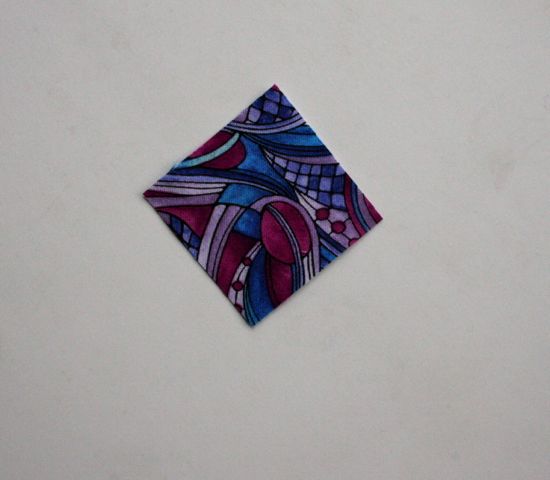
Start with a square. This one is 2 inches square. You can go bigger or smaller, as you like.

Choose the color of your next "square". It'll be made up of four "logs" around your center square, and all four logs will be from the same fabric. The logs can be any width that makes you happy.

I like to cut a strip in the width of my logs, sew the strip to one side of the center square, press well (I arbitrarily chose to press the seams toward the center), and then trim the strip to the proper size.
square up
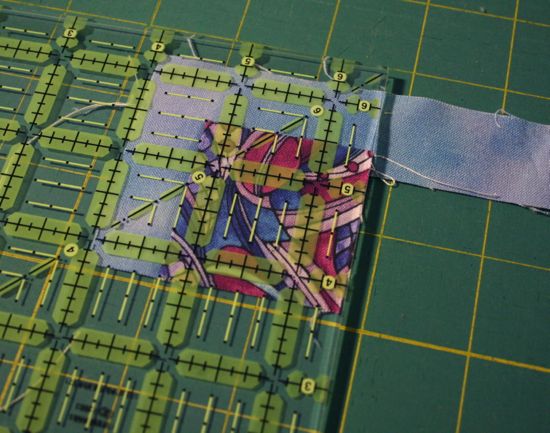
Keep adding the strip to each side of the center square, taking a moment between each addition to press and trim the strip as needed. Trimming as you go makes for a more improv feel while assembling the block and requires less planning and calculation. Be careful that you don't accidentally trim wonky and sacrifice your squareness!

Press well and often as you work. This makes things so much easier!

press well
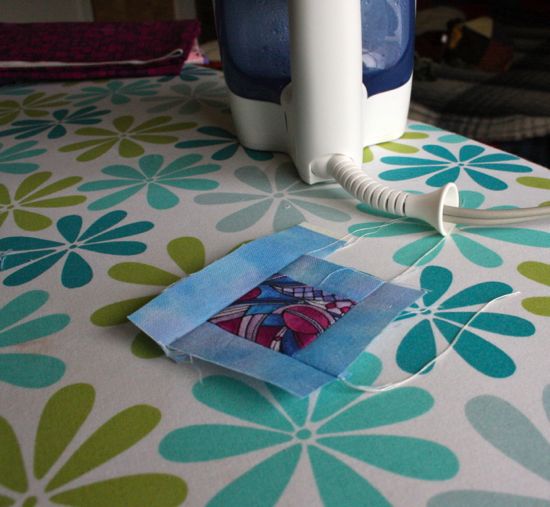
First round done! Now, repeat the last few steps for the next round. Choose your color, choose your log width, cut your strip(s), sew, press, trim, repeat.

square up
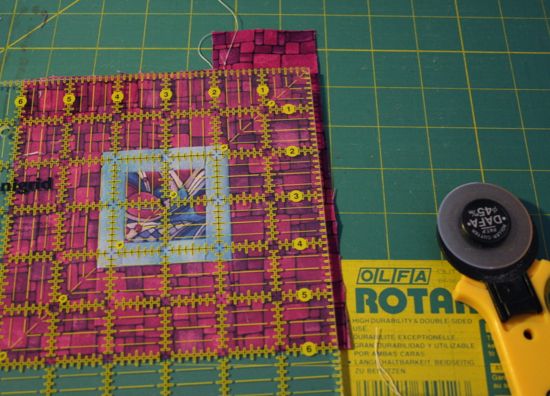
Don't forget to square up as you go. You want the whole block to stay square throughout the process (although wonky might be fun in a different project!)

3 rounds done
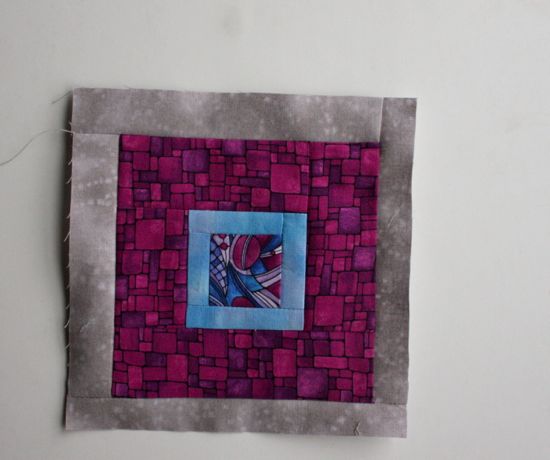
Three rounds done! With this gray "square", I added just a touch of irregularity. Two of my gray logs are just the tiniest bit thinner than the other two. It's a very subtle effect. If you choose to use it, be extra careful when you square up. It's really easy to trim off the extra width!

5 rounds - finished!
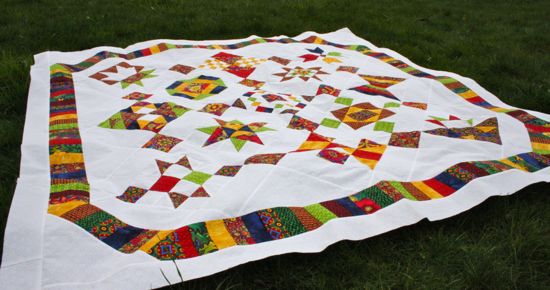
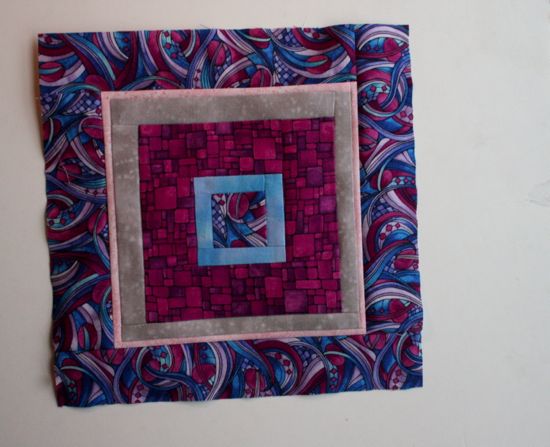
Five rounds done, and this block is about 10.5 inches square. That seemed a good place to stop.

second block
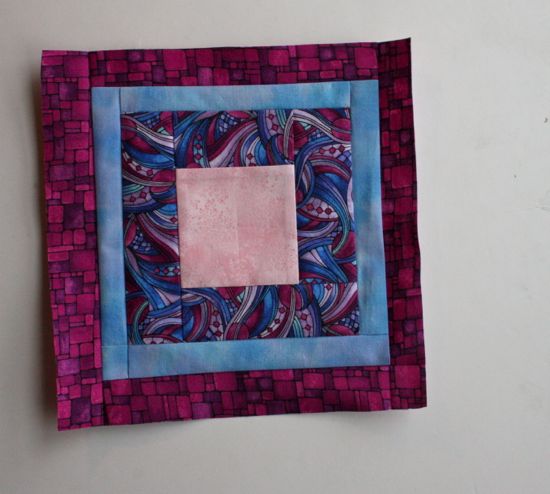
Same process, different block. This one started with a larger center square, used fewer rounds and finished about 8 inches square.

For Sew.Quilt.Give's March quilt, I'd like to take lots of Square in Square blocks and set them on point in a neutral background field. I sent all bee participants a fat quarter of the swirled feature fabric used here. Please use this fabric and add whatever other coordinating fabrics you'd like. Finished blocks should measure anywhere from 6 to 10.5 inches square. I'll add the final round of logs to each block so that we end up with a uniform background color. Please do at least three rounds of any width; if you choose to make a round or two uneven, please keep it subtle and avoid wonkiness. At least two blocks from everyone, please!

Let me know if you have questions, either about the bee or the tutorial. Enjoy!