My sewing space is in our bedroom. There's a table with my two machines which doubles as my cutting table (hooray for Ikea and height adjustable tables!), and there's the ironing board on the other side of the room. While this leaves me some open space for pin basting quilts or playing with colors and fabrics while planning a project, it means I bounce back and forth between the machines and the ironing board a lot.
I have one pair of fabric scissors. They are forever not where I am.
There are lots of solutions to the problem: buy more scissors; buy thread nippers to live at the machine; hang the scissors on a chatelaine; carry the scissors with me. I'm attempting that last option first.
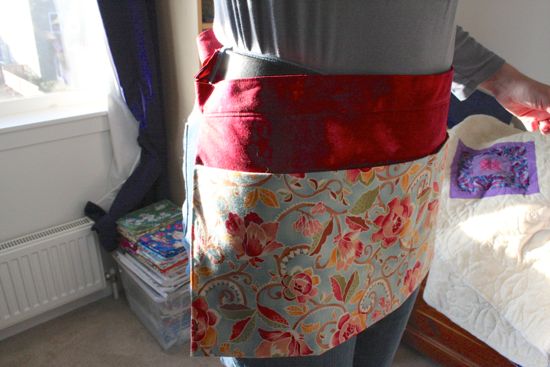
I'm not much of an apron person (I almost never wear one when I cook), but there's a certain appeal to pockets I can tie onto myself.
It's a simple apron, somewhat reminiscent of the apron I wore the summer I waitressed, somewhat inspired by an apron sample that was at Stash. All you need is a couple of fat quarters and something extra for the ties. I threw in some interfacing for structure (and because I had some). And if you'll pardon the unevenness of the following photos, you can see how I made it.
Start with two fat quarters (22 inches wide by 18 inches tall). Cut some strips to be your waistband and ties. My strips were 3 inches by something less than 22 inches, I think. I wasn't being really precise. Piece your strips end-to-end so you have a long strip; check that it is long enough to tie around yourself comfortably.
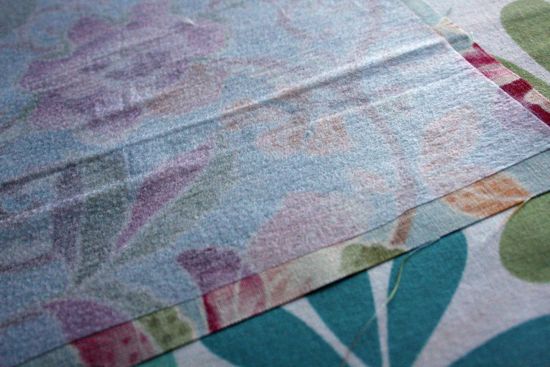
I added some fusible interfacing to the back of one of my fat quarters. This was a last minute decision partially to give the finished apron some structure, partially to be one more layer between me and any pointy ends that I might put in the apron (scissors, seam ripper, etc). I used some random stretch interfacing I had on hand. Trim the edges of the interfacing back from the edges of your fabric to minimize bulk.
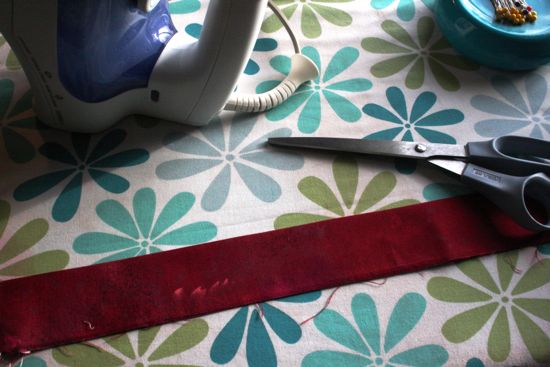
Take your long strip, fold it in half lengthwise and press. This marks the center line of the band.
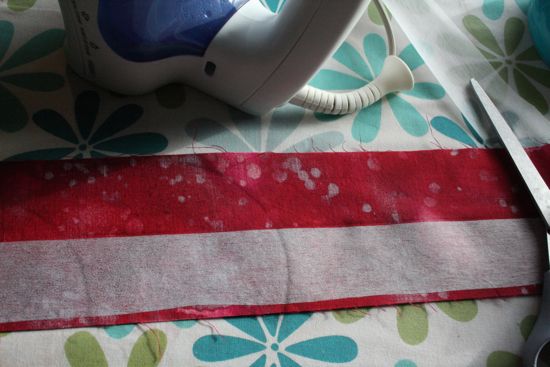
Since I'd put interfacing in the main part of the apron, I figured some interfacing in the waistband was appropriate. Just add the interfacing to one side of the fold down the center of the strip. I didn't interface the whole thing, just the part I thought would be wrapped around me, leaving the ends more flexible for tying.
Place the fat quarters right sides together and sew around three sides, leaving one long side open. I used a 1/4 inch seam allowance but you could use whatever is comfortable.
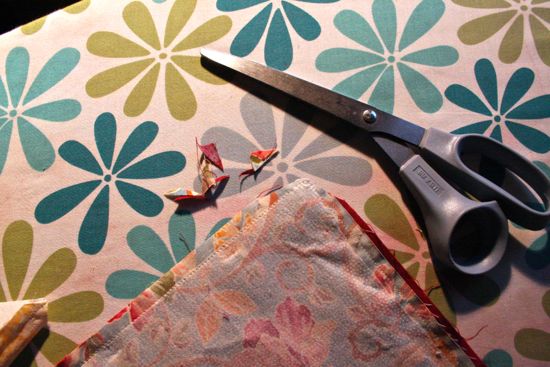
Trim your corners. Turn the apron body right sides out. Poke out your corners and press all the edges nice and flat.
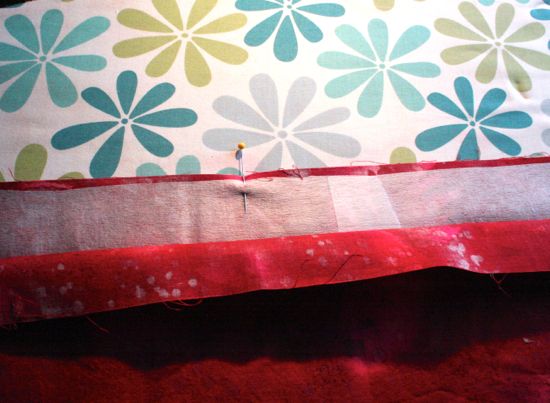
Find the center of both the apron body and the waistband. Match centers and pin.
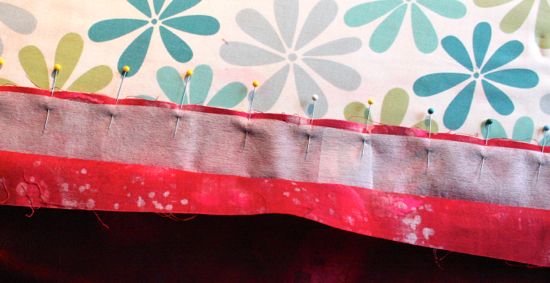
Then pin the waistband to the apron body along the raw edge, smoothing from the center. Sew or baste with a 1/4 or 3/8 inch seam allowance for the width of the apron body. Press the waistband up from the apron body.
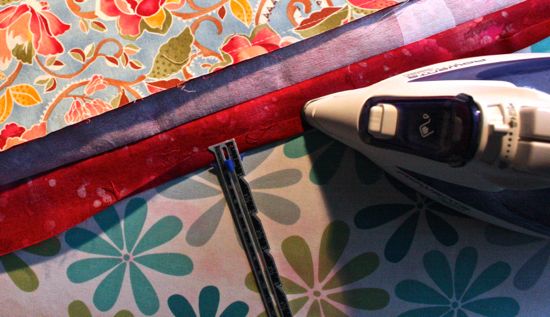
Now for the tricky part. Turn up and press all the unstitched edges of the waistband. Use the same measurement as your last seam allowance or go 1/8 inch smaller. Be careful, though. I started at 3/8 and the seam gauge slipped part way to 1/2 inch. I had to back up and repress about half of my waistband. Adjusting something by 1/8 of an inch is harder than it should be.
Fold the waistband over along the center fold (which you were careful and didn't press out while you were turning up raw edges, right?). Turn in the ends. Pin everything.
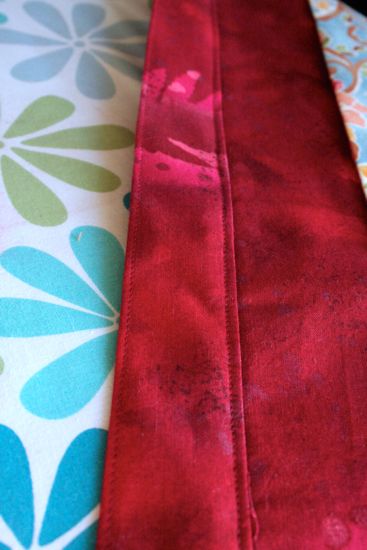
Edgestitch it all down, all the way around. You should have a nice neat waistband and tie enclosing the raw edge of the top of the apron body.
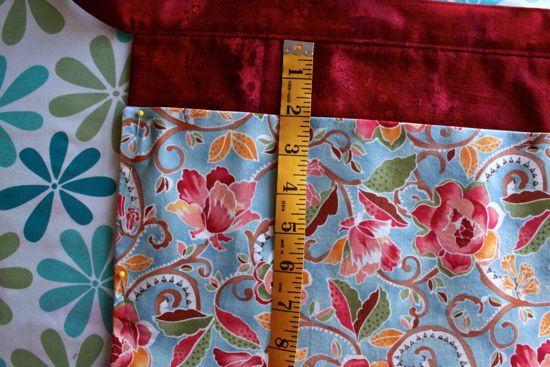
To determine how much to turn up the apron to make the pockets, I tied it on and turned up the lower portion to something that felt right, pinning the edges. I double checked that my fold was straight by taking it off and checking a few points. You want the top edge of your apron pockets to be an equal distance from the bottom of your waistband all the way across.
Pin your pocket edges and edge or topstitch.
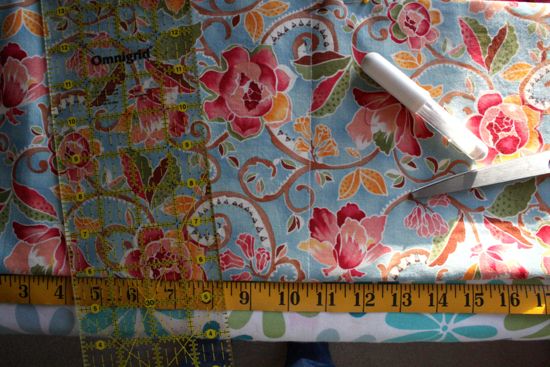
Find a comfortable place for the center pocket seam. I don't think I quite centered mine. I did check that my big scissors would fit before marking the stitching line. Mark your line and sew.
And that's it. A couple of pockets you can tie on so that your scissors are never abandoned on the other side of the room.
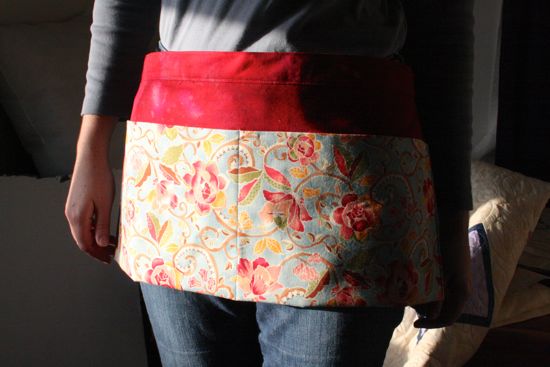
These fabrics came from my stash (I have a skirt made from the floral and I've been using up that red since 1997). So, while this project didn't immediately help me unbury my rocking chair, the hope is that I've made something that will contribute to the busting of more stash. And I used up some random interfacing. Here's to the start of another year of sewing, stashbusting, wardrobe improving, and finishing things!
January 28, 2014
Trying not to lose my scissors
Labels:
finished in 2014,
sewing,
stashbusting,
tutorial
January 26, 2014
Sew.Quilt.Give. Update
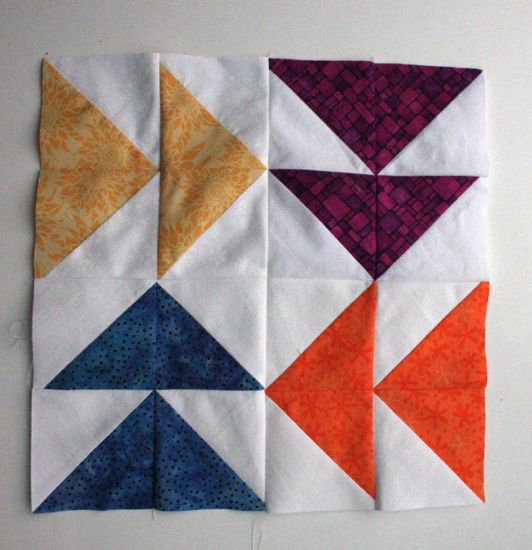
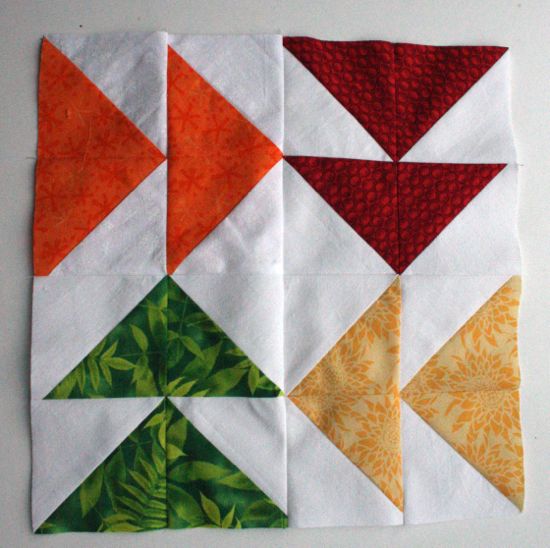
Sew.Quilt.Give., the online quilting bee I participate in, is back for another year of charity quilting. January's blocks were based on this tutorial from In Color Order. Look familiar? I've made this block before.
This month's bee leader has asked for brights, so I hope these will blend nicely with all the other blocks. I did use prints, but they are of the tone-on-tone variety, so they almost read as solids. Also, I don't think the orange is quite this aggressive in reality; orange is tricky to photograph well, I think.
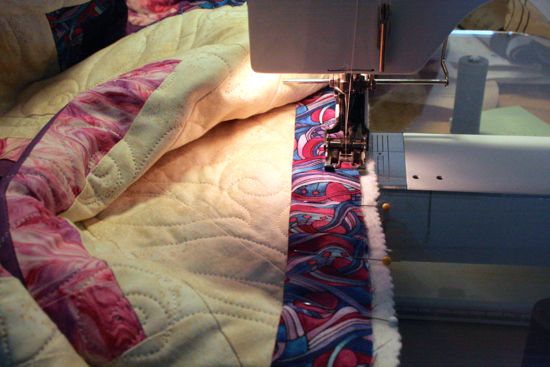
While we're talk SQG, I'm attaching the binding to my quilt from last March, finally. My friend Marissa and I spend something like 10 hours quilting it on Marissa's long arm a few weeks back. (Thanks, Marissa!) Somehow it's not as huge when you think of it as being 120 inches long, but the minute you convert that distance to feet and realize you're working with 10 feet of quilt suddenly it's a smothering quantity.
So, yeah. I'll be sewing binding for a while. It's only roughly 410 inches all the way around.
January 16, 2014
Two Shawls
Do people even wear shawls these days? Like, in public? My mom had (still has?) a white shawl which I remember she sometimes wore to church on Easter Sunday. But despite the many shawls I can find on Ravelry (I'm on Ravelry, but it's pretty pointless following me since I don't queue or show off projects there) and in books, I can't think of a single time I've been out and about and have noticed someone wearing a shawl like it was no big thing. The kid I saw wearing his fuzzy team blanket on the way to watch a Seahawks game doesn't count.
I seem to like making shawls, though. They are big enough to be a satisfying project without getting as unwieldy as a blanket. You don't have to do any fitting. You barely have to think about gauge. And although I'm still trying to figure out how to wear them, especially when I leave the house, they seem like a good idea for me, given my tendency to wear blankets when I'm home. (Don't knock it: a fuzzy crocheted blanket wrapped around you toga-style is perhaps impractical for most things but oh-so-cosy for end of day couch time.)
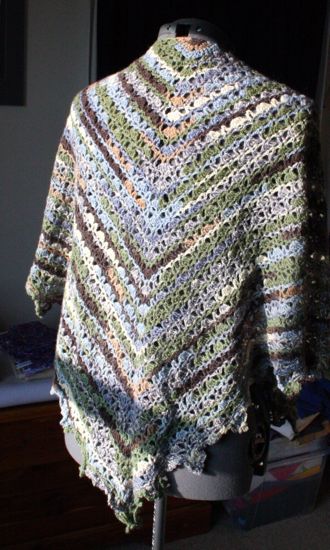
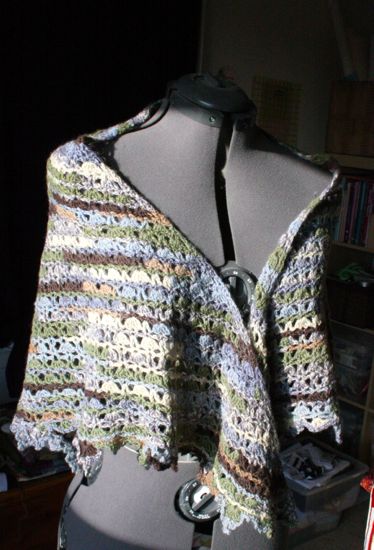
This shawl started as a pair of socks. I picked up crocheting because it's a portable crafty project to work on in loose social situations or while waiting for Caitlyn somewhere; quilts don't travel well. Making socks seemed like a good, small project that would finish with something useful. I don't know if it was the pattern or me, but what I ended up with, after finishing one sock and starting the next, was a saggy, sloppy thing, with the weirdest bulge at the top of the foot. This was a sock you could wear over a tennis ball sized growth. I gave up and tore it all out.
I found this pattern on Ravelry and used up almost all the sock yarn (just some JoAnn branded wool blend). The pattern probably wants a differnt yarn or maybe just a larger hook. My version is significantly less lacy than the pattern photo.
But! This shawl isn't so big that I can't wear it under a jacket. If I wear it "backwards" it works as an scarf accent (maybe?); when I get to where I'm going and the big jacket comes off, the scarf turns around and becomes more shawl like, keeping my shoulders warm in cool restaurants.
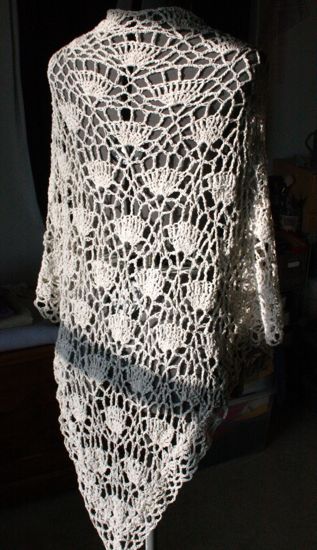
Now, this next shawl is much bigger and I haven't decided how best to wear it. The yarn came from a abandoned and reclaimed knitting project (I used to knit - who knew?). I'd started a sweater back in the mid '90s and either got the wrong yarn, used the wrong needles, or just didn't get the gauge right. After finishing the back and half a sleeve, and after using up more than half the yarn I'd bought, I was clear I was knitting something for someone maybe half my size. The project lived in a bag for years (and moved several times) until finally a friend ripped it all out for me.
This is a much better use of the yarn. The pattern is here, and I think I did a much better job matching hook size and yarn weight this second time, too.
Now, if only I could figure out how or with what to wear this one...
January 08, 2014
Making the Pledge
I really fell off the stashbusting wagon by the end of last year. I don't recall that I made any formal pledge to not buy more fabric; maybe that's why I didn't make it. I'd like to blame something other than myself and either my lack of self-control or my ability to talk myself into anything fabric-related, but I'd only be doing it to make myself feel better. It wasn't the discount's fault. It was only doing what it was supposed to do (get people to buy fabric)... I'm the responsible one who can not eat the chocolate and not read the books when either is available and when I should be doing something else. But fabric at 20-50% off? I guess I need to work on resisting that.
I have this pile, from 2012 that spent all of 2013 in my rocking chair, despite my best intentions to convert it to things I could put in my closet. I stitched up a few things in 2013, but none from The Pile.
And then, at the end of the year, I bought more fabric. ::Hangs head:: Some of it I bought because Stash (the little local fabric shop I was working at) was going out of business and I had been eyeballing certain things for months. Some of it was selected by Ian and Caitlyn because they both need new things.
At least I haven't started buying fabric without a plan for it. Yet.
The good news here is that the Stashbusting Sewalong that I stopped paying attention to last summer is re-launching itself. Hooray for second chances! And so, in the interest of playing by the rules and of putting goals out there where the universe (or at least you fine folks) can reach out and smack me if I get distracted by the shiny things:
I, Christina of Dolcideleria, commit to sewing from my stash fabric in 2014. My goal is to finish those quilt tops I've started (thus freeing up storage boxes for fabric that's currently homeless) and to sew up the garments for which I've been collecting fabric. I commit to not purchasing new fabric (unless I need it to finish a WIP) until I am able to sit in my rocking chair once again.Now, I just need to make a goal about making the time to do the sewing. Suggestions?
January 06, 2014
A Most Epic Quilt Project
Ok, that's a bit grandiose of a title. But wow, this project got big!
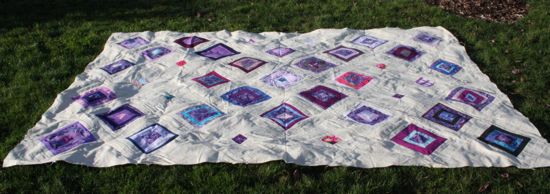
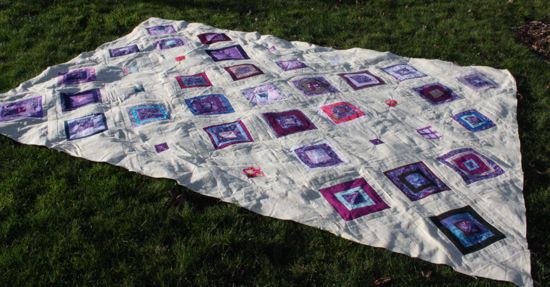
This is the quilt top for last March for Sew.Quilt.Give. March was my month to request block contributions. I asked for square-in-square blocks in a range of sizes with the vague idea that I could float them on point in a spacious background. I'd this quilt from Canton Village Quiltworks in mind, with a touch of this one and this one.
Next time, I really need to bust out the graph paper and turn those vague ideas into something concrete.
I started off putting a creamy neutral border on each block, to get them all to 12 inches. I made a handful of extra blocks with single squares. This brought the block total to 40, at which point I started trying to find a layout.
Again, wishing I'd drawn something first!
Also, forty 12 inch blocks, positioned on point, take up a lot of space. I even thought of making two quilts out the blocks.
And because I was still trying to get the floating look, I shashed the whole thing, so it's even bigger.
Don't get me wrong, this is a fine quilt. But it's not the quilt that was in my head a year ago, not that I'm really sure now what that quilt was (have I learned to sketch out designs first, do you think?), so I'm a touch disappointed.
On the other hand, the quilt is getting closer to finished (I hope to have it quilted by the end of the month) and it will be a quilt big enough for a queen size bed. All Sew.Quilt.Give. quilts are destined for charity. Do any of my local readers know of a reputable charity who would be interested in a quilt for a teen or adult? I feel sort of silly handing this off to a children's charity...
January 01, 2014
A Knot for the New Year
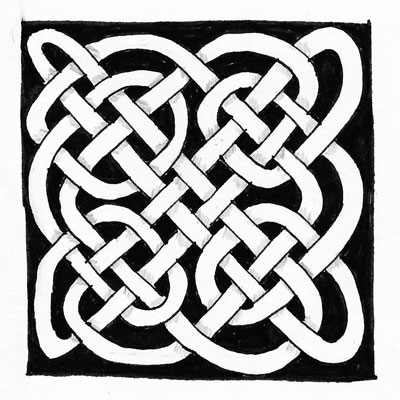
I haven't drawn a knot in years, but today it seemed like the thing to do. I had to go back to my reference book (Celtic Design: Knotwork by Aiden Meehan) to remind myself how the knot was supposed to wind itself around the guiding grid. This knot is done on a grid done by Mr. Meehan, so while I've drawn this one, it's copied from one of his designs.
Maybe there will be more knots (of the artistic variety) this year?
Subscribe to:
Posts (Atom)